Bitwig and Stepwise
A new Bitwig is available in beta and it contains a couple of new devices. One of them is this fun little sequencer called Stepwise. And, in true Bitwig fashion, it can be routed and modulated in interesting, non-obvious ways.
Layering Lanes
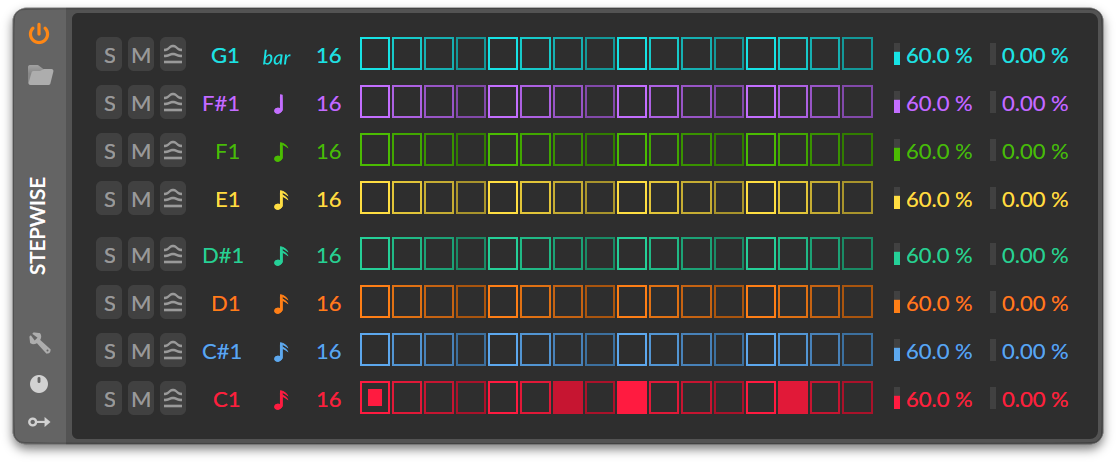
Each instance of Stepwise gives us eight lanes ready to go (see fig 1.1). By default, each is assigned a different note — starting at the bottom we have C♯1, then C♯1, D1, D♯1, and so on…
But there’s nothing that says each lane has to play a different note.

We could, for example, give two lanes a note of C1, but change the length of one of them to give a bit of polymetric flair. Like a pattern that accents every third down beat (see: fig 1.2).

Or we could assign three lanes to C1 and give each a different timing rate. Like, a sixteenth for one, an eighth for another, and a quarter for another to create patterns that evolve beyond a single bar (see: fig 1.3).
If we go crazy with this, we may worry we’ll start running out of lanes. No problem! Just add another Stepwise to the chain to get 8 fresh lanes to play with.
Note FX per Lane

A request I see online is for each lane to have its own nested Note FX chain to uniquely transform triggers with. That’d be a great addition! But in the mean time, we can get the same results by putting Stepwise into “Use MIDI Channels” mode and adding a “Note FX Layer” device after it (see fig 2.1).
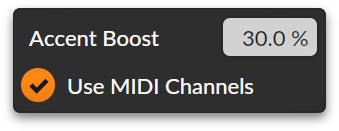
By clicking the “Use MIDI Channels” box in Stepwise’s inspector panel (see fig. 2.2), we give each lane a dedicated MIDI channel. Starting at the bottom, the red lane will send on MIDI channel 1. The blue lane above that uses MIDI channel 2. And so on, up to channel 8 on the top.
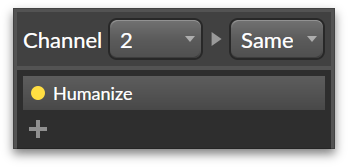
Having a unique channel for each lane lets us easily route it to a particular layer of a “Note FX Layer” device. We simply need to place the device after Stepwise, add a few layers, and then (crucially) set each layer to receive only from a given MIDI channel. To do this, we select a layer and, in its inspector panel, change “Channel” from “All” to the channel of the lane we want it to effect (see fig 2.3).
Now each Stepwise lane can have its own set of Note FX without cluttering up the rest of our top level chain.
More Than 16 Steps
Another common request is to give Stepwise more than 16 steps.

Now first off, when one reaches a certain level of complexity with any device in Bitwig, the time comes to throw it out and start working in the grid. We might be reaching that point here (see fig: 3.1). Bitwig has added some great modules to help us make our own “Stepwises” in the Grid — “Step Access” for the phase and “Accents” for the trigs. And these can easily scale up to 64 steps.
But if we’re hell-bent on doing it in the chain,1 modulation can help us out. Here’s how:
Let’s say we want a 64-step pattern. First thing we need to do is put down four Stepwises (64 ÷ 16 = 4). Then we need to deactivate each of them by clicking the ⏻ button in their upper-left corners.
Great. We have a bunch of disabled step sequencers. Now what?
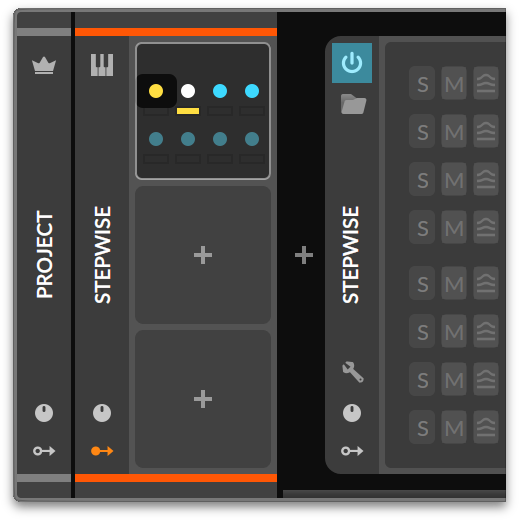
The trick is to use a modulator to enable them one at a time, one after the other. To do that, we’ll use “ParSeq-8”. ParSeq is like a step sequencer, but allows us to set a unique modulation mapping for each step. So we can select the first step and map it to enable the ⏻ button of our first Stepwise device (see fig 3.2). Then we can map the second ParSeq step to enable the second Stepwise device, and the third to the third, and so on. Now each of our Stepwises are enabled, one at a time, each time ParSeq takes a step!
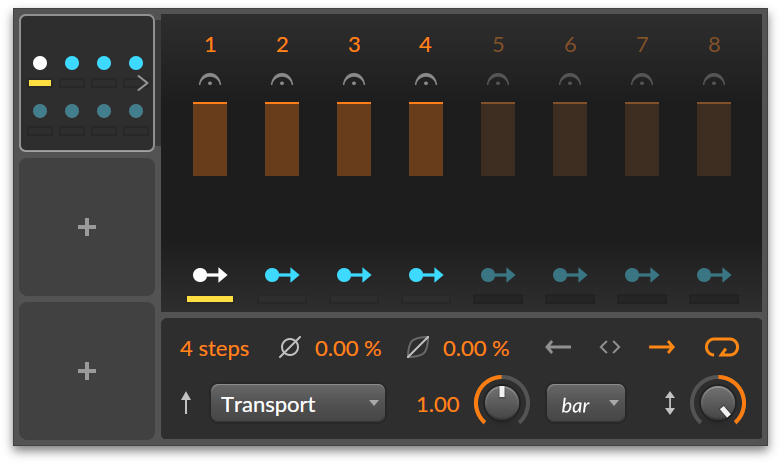
The only thing left is to set up how many steps ParSeq takes, and how quickly. Opening up its extended parameters, we set its Step Count to “4” (one for each Stepwise we want to enable). Then we set the Timebase to “Bar” so that each ParSeq step lasts a whole measure (see fig 3.3).
And that’s it. Now each of our Stepwises will play back-to-back, one each bar. It’s a bit of a hack, but it’s amazing the power Bitwig gives us with just its general purpose devices and modulators!
-
And I am. ↩︎
